Receipts in Qualpay Manager
This page provides instructions for using the Qualpay Manager portal to customize the receipts you send to customers. By default, Qualpay uses a receipt profile with minimal information prefilled so that you can start transacting and sending receipts immediately. By accessing your receipt profile in the Qualpay Manager portal, you can customize your receipts for Hosted Checkout, Virtual Terminal, Payment Gateway, Invoicing, or Recurring Billing.
Prerequisite
Follow the steps in Create a Sandbox Account to sign up and create a password for a Qualpay merchant sandbox account. (This can be either an independent merchant account, or the sub-merchant account set up for a partner sandbox account.)
Access Your Receipt Profile
-
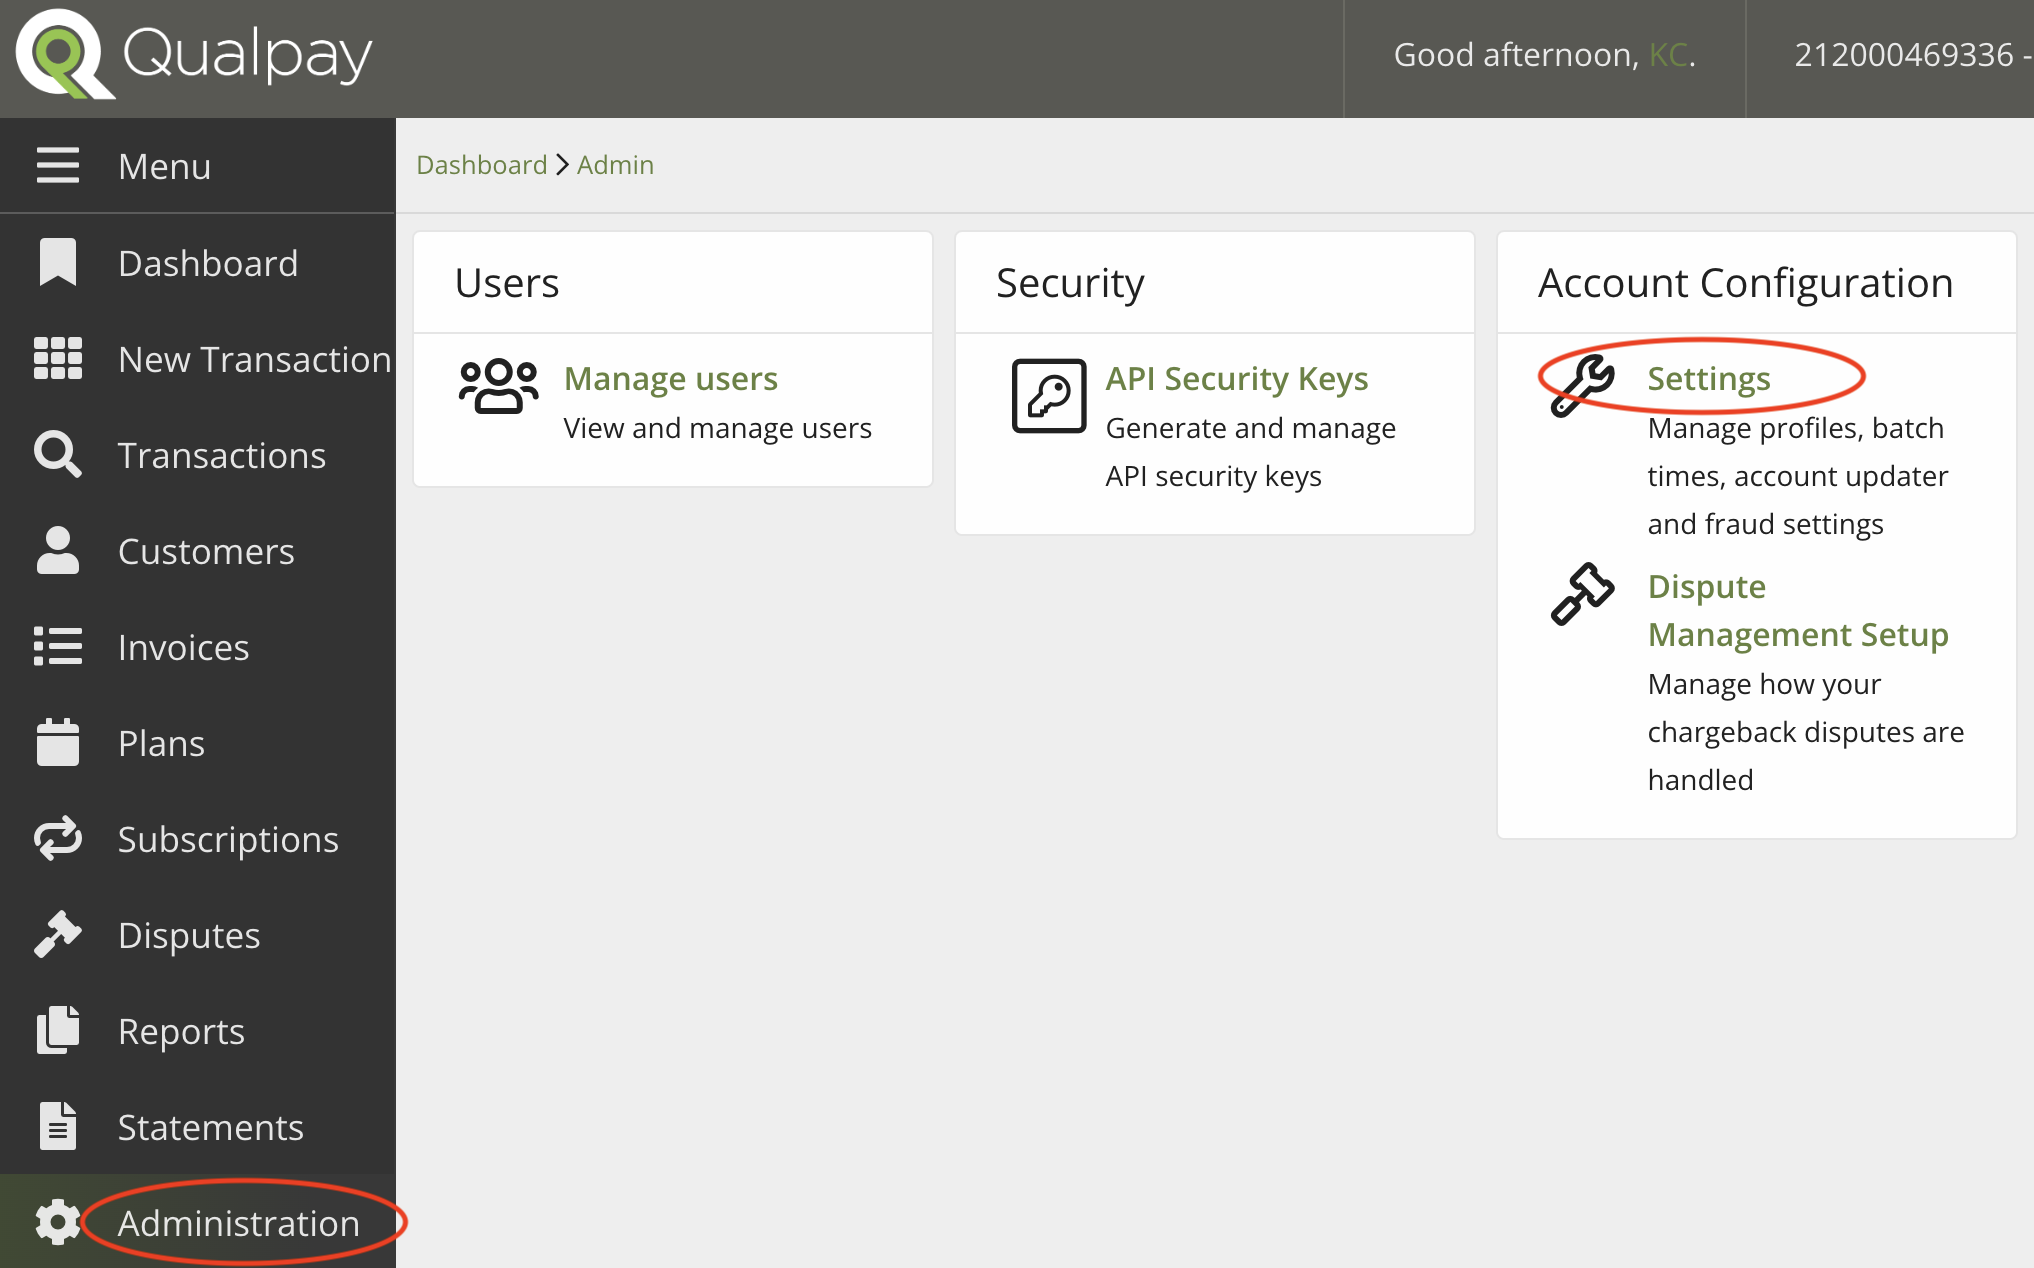
Sign in to your Qualpay merchant sandbox account and select 'Administration' in the left-hand menu.
-
Under 'Account Configuration,' select 'Settings':
-
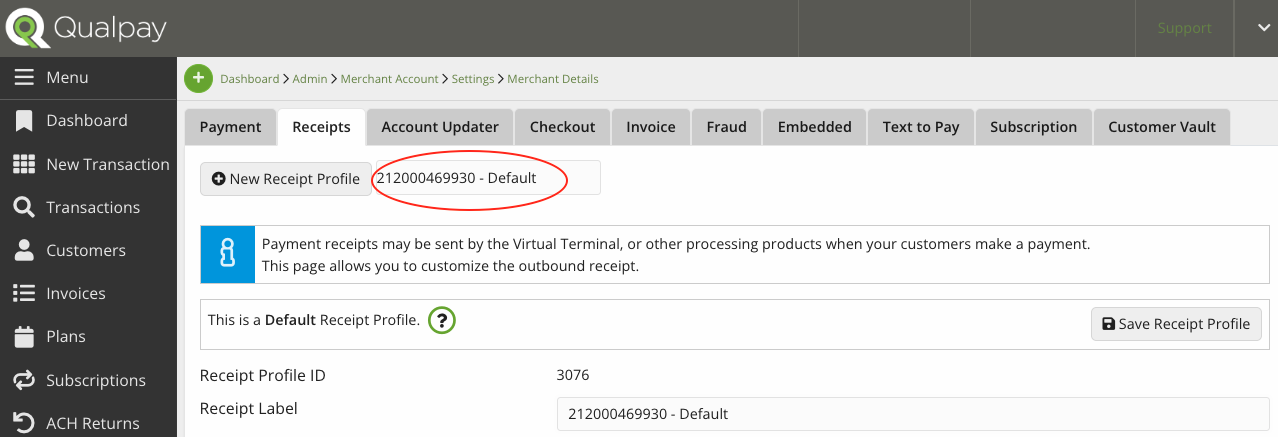
Select the 'Receipts' tab at the top:
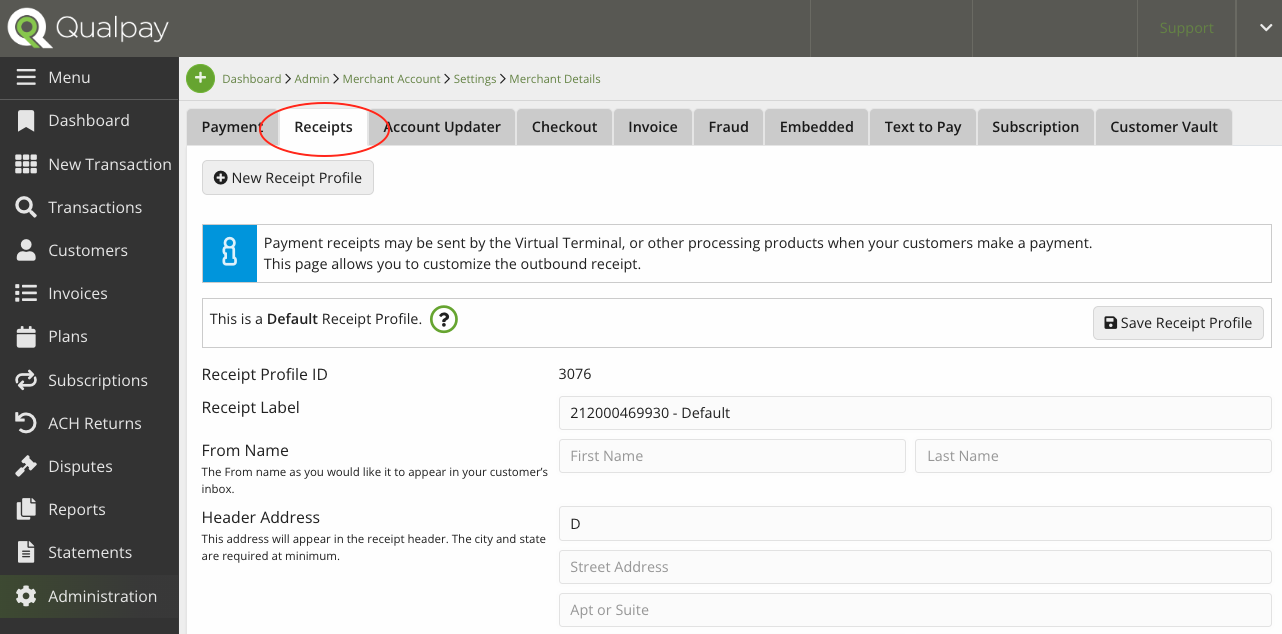
You are now on the receipt configurations page for the default receipt profile in use by all of your Qualpay products.
Create a New Receipt Profile
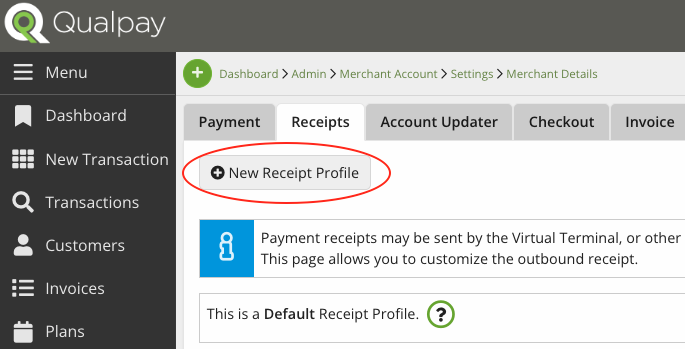
Your sandbox account is already set up with one receipt profile. To create additional receipt profiles, do the following:
-
While on the receipt configurations page, select 'New Receipt Profile' in the top left:
-
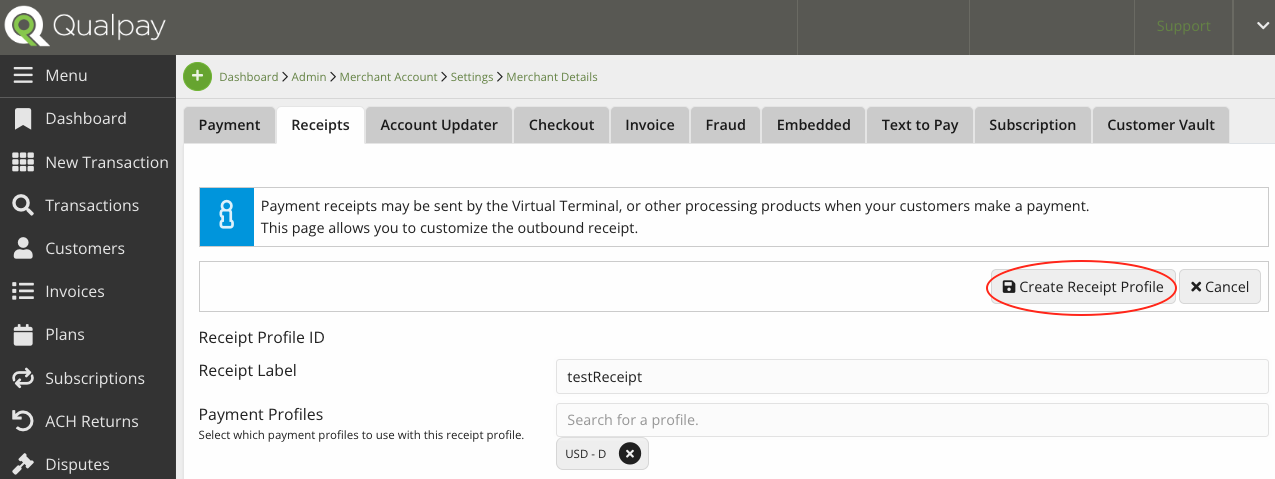
Customize your profile using the 'Configure Your Receipt Profile' section below. (Note that you can always update configurations after creating the receipt.)
-
Select 'Create Receipt Profile':
Select from Multiple Receipt Profiles
If you have created additional receipt profiles, ensure that the desired receipt profile is selected:
-
The selected profile is listed next to 'New Receipt Profile' at the top of the receipt configuration page.
-
To change profiles, click on the name next to 'New Checkout Profile' and select from the drop-down menu that appears:
Configure Your Receipt Profile
Once you have accessed your receipt profile, the list below guides you through setting your preferences for each field of the configurations page:
- Receipt Profile ID - View the ID number of the receipt profile. The Checkout API requires this if your account has multiple active receipt profiles.
- Receipt Label - Type to add or edit the receipt profile's name.
- Status - This is visible for non-default receipt profiles. Toggle to change the profile's status between 'Active' and 'Disabled.'
- Payment Profiles - This is visible for non-default receipt profiles. Click on 'Search for a profile' and use the drop-down menu to select one or more currencies. You cannot select a currency already associated with a non-default receipt profile.
- From Name (optional) - Type your name as it should appear in your customer's inbox.
- Header Address (city and state required) - Type the address that should appear in the receipt header.
- Header Telephone Number (optional) - Type the phone number that should appear in the receipt header. This should be a customer service number used for payment inquiries.
- Header Email Address (optional) - Type the email address that should appear in the receipt header. This should be a customer service address for payment inquiries.
- Reply To Email Address (optional) - Type the email address that should receive customer replies. When a customer replies to an emailed receipt, this populates the 'To' address.
- Header Website Address (optional) - Type the web address that should appear in the receipt header.
- Footer Text (optional) - Type a footer that should appear at the bottom of your receipt. We recommend using this space for information about your return policy or other terms and conditions.
- Sub Footer Text (optional) - Type text that should appear below the footer text. This will appear in a smaller font than the footer text.
- Display Line Items (optional) - If you submit line item details with your transactions, toggle this to 'Display' to show line items on the receipt.
- Display Billing Information (optional) - If you submit a complete billing address with your transactions, toggle this to 'Display' to show it on the receipt. A complete billing address includes street address, city, state, and zip code.
- Display Shipping Information (optional) - If you submit a complete shipping address with your transactions, toggle this to 'Display' to show it on the receipt. A complete shipping address includes street address, city, state, and zip code.
- Display Merchant Reference Number (optional) - Toggle this to 'Display' to show your merchant reference number on the receipt.
- Display Payment Gateway ID (optional) - Toggle this to 'Display' to show the transaction's Payment Gateway ID on the receipt.
- Display Purchase ID (optional) - Toggle this to 'Display' to show the transaction's purchase ID on the receipt.
- Display Surcharge Fee Title (optional) - Select the surcharge fee title to display on the receipt if you use a surcharge. (Please reach out to your Qualpay representative to add the capacity for surcharges and convenience fees to your account.)
- Display Convenience Fee Title (optional) - Select the convenience fee title to display on the receipt if you use a convenience fee. (Please reach out to your Qualpay representative to add the capacity for surcharges and convenience fees to your account.)
- Display Service Fee Title (optional) - Select the service fee title to display on the receipt if you use a service fee.
- Receipt Logo (optional) - Upload an image to display in the receipt header. To do this, drag a file into the 'Receipt Logo' space or click 'Choose or drag files here' to select the image.
- We recommend using your company logo here.
- The image must be a PNG file of no more than 2 MB.
- For best results, use an image 180-600 pixels wide and 90 pixels tall.
Changes to your receipt profile do not automatically save. Remember to select 'Save Receipt Profile' in the top right to set your configurations.